

Hi everyone!
I figured it would be cool if I did a DIY tutorial for you! I was cleaning up my closet and found some old shirts and decided to use those. Well, there's nothing to explain further I guess, so keep on reading if you want to know how I did this!

You'll need: an old shirt of your choice, fabric scissors, needle and thread.

First cut off the collar

Then, fold the front piece in half.
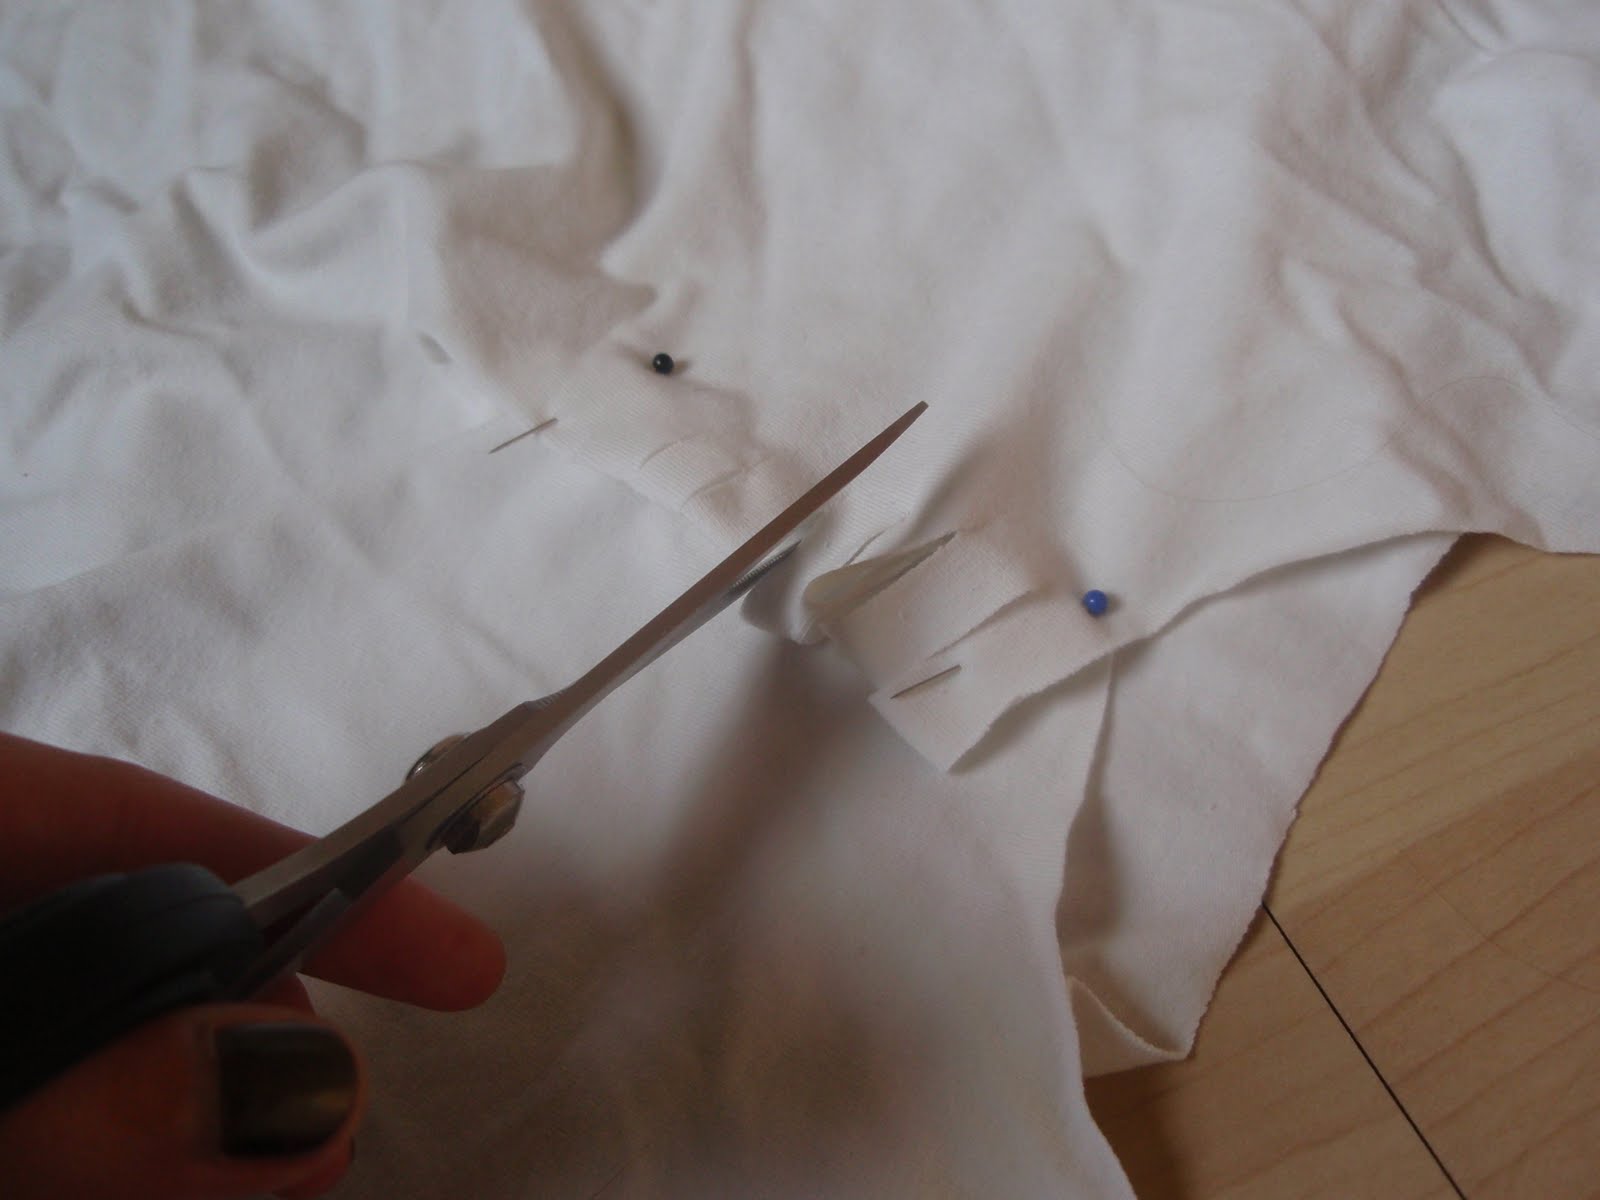
Pin in place and cut little strokes, they are about 3cm at the top, and 1cm at the bottom. So cut smaller strokes as you go down.

When you unfold it should look like this, it looks like a triangel shape.

Stretch the fabric out a little bit, this makes it easier to pull down.

Take the top piece and take it over the second piece. Then take the second piece and pull it over the third one. Go on until you reach the end. Take your needle and thread and fix the bottom piece.

It should come out looking like this.

Next I'm cutting off the shoulderpieces.

Now fold the shirt in half and also cut strokes, these all have to be the same length (about 5cm). You can go all the way down if you want, I stopped about at about two-third of the shirt.

Now use the same technique as you did on the front.

Fix the bottom piece again with needle and thread and there you go! The back should look like this.
Hope you liked this Do It Yourself tutorial, I hope it was clear, it was quite hard to explain!
love,
Natasja
No comments:
Post a Comment
Your words make my day!